Apr 23, 2013

What is this?

The projects continue in our little cottage. I am particularly excited about how a new dining room accessory is shaping up.
There is a single window at one end of the dining room and it was a bit too wide for the curtain pole we used. As you can see below, it bowed in the middle and we always wanted to 'get around' to fixing it. But, you know how that goes. Those tiny projects never get done when there are whole rooms still needing to be remodeled!
This project was put off...until...I found an incredible deal on a barn door track I had been eyeing for ages. I made it one of my birthday gifts (mentioned here) and after a while of living with the boxes piled up in the dining room we put it up!
Apparently, no project is complete without an almost-naked Henry 'helping' Daddy.
 
The track is 8 feet long and looks beautiful! For now, we hung the curtain back up but it will eventually be replaced by a fun rolling 'art' piece I'm working on. The chalkboard you can see in the picture below was hung up to keep it out of the way for now. I had to buy it in order to get the wheel assemblies (the wheels weren't sold separately) and it will eventually go in my craft room. The wheels will hold the new window covering...which I hope to get up by summer.
Hooray for progress!

PS - for more pictures of our dining room, you can see these posts: the unblogged room, the light list, chalkboard, and a cover up.

Feb 28, 2013

a cover-up

When we got our new dining table a few people asked me about what chairs we put with it. At the time, I didn't know what we were going to do. We had 2 different sets of chairs and were trying to figure out how we'd sell our other table...and which chairs we'd sell with it.

The old table was fine. I bought it when I was single and it was great for a long time. Before kids. It was a polished wood table and scratched easily. Not the best for little ones who seemed to scratch it just by looking at it. An 'off limits' kind of dining room is not workable in our house so we had to get a table that would stand up to the kiddos.

We love the rough Pottery Barn table we got, but since we splurged on it, there wasn't anything left in the budget to buy a new set of chairs. We Craigslisted the other table and included the wood chairs that I had with it. They had white seats which was also a no-no with kids.

We kept four upholstered chairs. Two with arms, two without. I liked the stripey fabric on the chairs, but the tan/brown tones didn't mesh well with the newly painted gray dining room walls. I knew I had to cover them.

I love white, which is pretty obvious when looking at the decor choices I typically make. And as I browsed online for inspiration I kept coming across pictures like this:
 via
 via
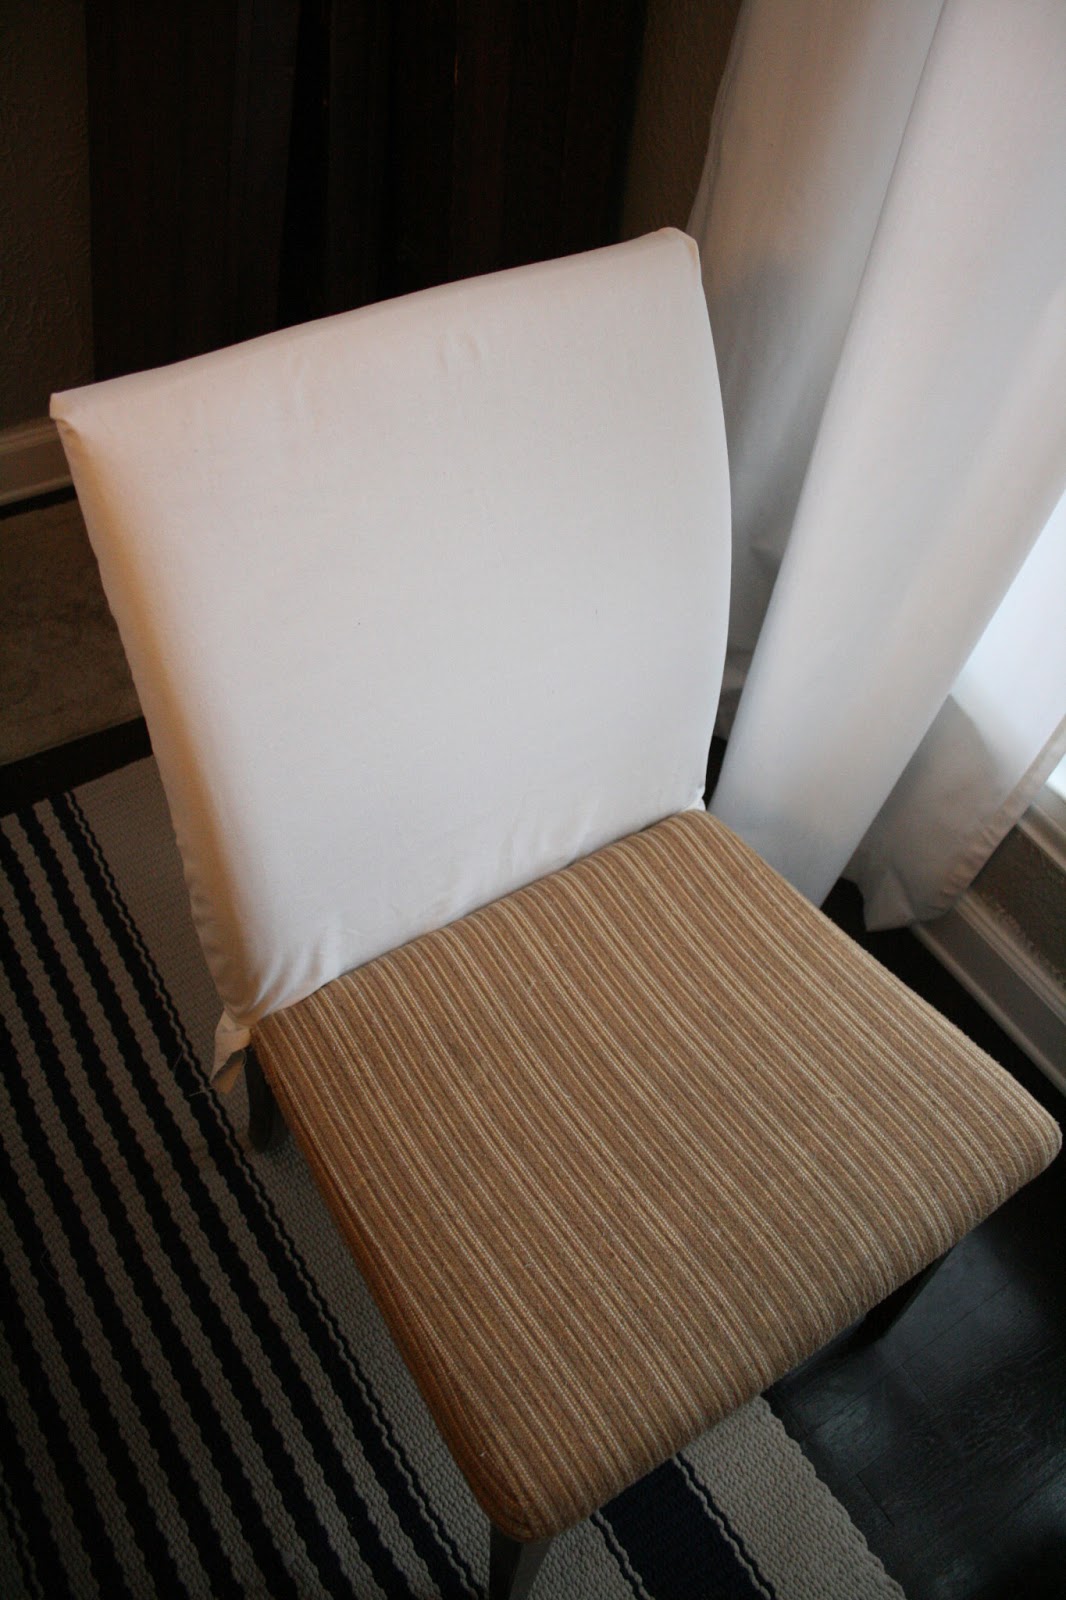
There were dozens of other inspiration pictures that made me want to make my own slipcovers for the chairs and then paint them. So, I got some white canvas fabric and started working on covering those stripes up.
I took these pictures last February, whoa, it was a whole year ago! I had planned on putting together a tutorial because I was really happy with how the covers turned out. But...I ended up scrapping the ones I made when I found another alternative.
I finished the covers for one whole chair and then did the back on another one. THEN, I found these.
I found these slipcovers from World Market and, even though they have a strong pattern and are almost 'ugly' I thought they'd be perfect for the chairs. They pretty much have a shade of all the colors in the house and thanks to a great coupon, gift card, and sale...they were cheap! Plus, the practical side of me decided that I was living in fantasy-land thinking that white chairs would stay white with 4 small kids around.

I tucked the white covers and fabric away for the future. I can always get them out and finish them for a holiday or something. I had fun plans for painting them once they were done. I'd still like to do it...someday.

So these covers solved the problem of 4 of the chairs. Although, I still have some things to finish, like cutting a hole in the side of the fabric covers so I can reattach the chair arms. Right now they are looking lovely with the arms hanging down. (hopefully you can sense the sarcasm) Pretty, right?
Obviously, 4 chairs is not enough for this family. We wanted something that could get tucked out of the way for the side of the table we walk by the most. Pottery Barn sells a bench that goes with the table that was perfect and, thanks to a special promotion that gave us money back on the table...we spent the money 'saved' on the matching bench. After we got the bench, I found the cushion on the clearance section of PB for only $20! It's been stained and marked with pen already (Henry is a pen-fanatic), but it's cushy and works for the kids' side of the table.
Oh, and you can see the dining room rug in the picture above. It's from Pottery Barn too. It's an outdoor rug (aka - you can hose it down when needed) and it has held up really well under the table. I wish we could buy a nice rug pad that keeps it down on the ends a little better (you know the fancy ones that grip the floor and the rug), but they're almost the same price as a whole new rug so it's hard for me to justify getting one.

The stair runner can be seen from the dining room too, and it's got a similar pattern/color. Yay for coordinating without trying! :)

Feb 26, 2013

the light list

More about the dining room details...

Here's a look at the chandelier over the table. We had a list of a few criteria when choosing a light fixture for this area:

1. No exposed bulbs. Since the light hangs at about eye height, and we have to walk through this room to get to our kitchen, we didn't want to be blinded by exposed bulbs like we were with the previous light fixture that hung here. This ruled out a lot of the really beautiful fixtures we liked, but it was necessary.

2. An 'open' sight line. Again, because it's at eye level, we thought having an enclosed shade (like a drum shade or a long rectangular fabric shade) would block the light from the front windows and make the room feel smaller since you wouldn't be able to see it all.

So with those two 'rules' we started looking for the right fixture. I love Restoration Hardware light fixtures and we put several of them in our house throughout the renovation (in the kitchen and kids' bathroom). Before we moved out I had fallen in love with a candle looking chandelier from there...but cha-ching...it's almost $900.
Now Lowe's has a very similar looking version, but they didn't at the time. Although, I did come across a similar looking fixture on ebay (probably about 3 years ago) and it was maybe $200 (I can't remember exactly how much it was). So we bought it and hung it up. This is what it looked like:
Nice, right? It was designed horribly and wouldn't stay up. I complained immediately and tried to send it back. The woman who sold it to me (a total scammer) said if I would keep it she'd refund everything but $50. Michael thought he could fix it and keep it upright but we sent it back anyway. It was a total hassle. She claimed it was broken in shipping and tried to scam the post office. What a pain to save money!! The old light fixture went back up. You can see the style of it in this old picture (the blast from the past costume party again):
That was the fixture in the house when we moved in. Not my favorite.

While we were living in our rental and in the midst of renovations, I went to a baby shower at a house in Minnesota. It was an old house that the family had gutted and fixed up. She had a gorgeous light fixture over her kitchen table that I became a bit obsessed with. I have a picture of her house, but it's on a currently broken hard drive, so here's a picture from the lighting company (Rejuvenation):
I seriously love this fixture and it began my obsession with the store too. Remember when we went to visit it in Seattle? They thought we were crazy fans. And Williams Sonoma's purchase of the brand made me buy stock in them. Good move!
This fixture was cheaper than the Restoration Hardware one (it's $510-ish) but I wanted to put in TWO over the dining table. That sadly wasn't going to happen. I actually have another spot in my house in mind for this light if we ever get around to finishing everything else (I'm not holding my breath). But it wasn't meant to be for the dining room.

After much research, we settled on a light from Overstock and we like it. I don't remember the exact cost but it was under $200 and it met our list of requirements. No exposed bulbs, check. Open feeling, check.
We wish the glass pieces were more white (we're not fans of yellow toned lights), but when it's on it gives plenty of light and we're happy with it. We're also pretty thrilled with the additional light switches we put in during the renovation. We used to only have one switch in the dining room. You had to cross the entire room to get to it. Now we have THREE switches and the light is on a dimmer so we can control how bright it is. We also added 4 recessed lights (two on each side of the room) for some ambient light and they are on dimmers as well.

Lately we have been talking about a diy change-a-roo for this light fixture so when I get up the gumption to switch things around, we'll give this light a makeover. Why can't we leave anything alone? :)

Feb 25, 2013

the unblogged room

Our dining room has gotten very little attention on this blog. We switched out the table when we moved back in after the big part of the renovation, but there's more to this room than the table...we just haven't blogged about it.

The room is far from being completely finished, but it's waaaaay better than it used to be.

Here is the dining room before the water damage (during a fun little mystery party):
The dining room went through various stages of life pre-water damage. When we decided to add a staircase to the basement by cutting a hole in the living room floor, we turned the dining room into our living room. This picture was taken in our dining-room-turned-living room the day Emma (baby #2) was born:
Once the family room was put back together, the dining table came back into the room. This picture was taken the week baby Isa (#3) was born:
Then, the water damage happened. Here's the dining room when we first moved out to start fixing the damage. The hardwood floors had to be dried so they wouldn't warp from the water. Interesting process. These big mats have little holes and are hooked up to air hoses that circulated air through them for several days.
We always knew we wanted to keep the rough plaster walls (we love the original plaster and had to lose most of it because of the water). So in the dining room we kept the rough walls, but smoothed out the ceiling. HUGE difference! We also widened out this doorway and squared it off (it had rounded edges before). Then Michael added some beautiful trim and crown molding that was at least twice the size of what was there before. Trim makes an amazing difference.
When we first moved back into the house, the dining room looked like this for several weeks. The appliances couldn't go into the kitchen until the floor was down so they stayed in the dining room along with all the tools to finish the kitchen. YIKES! I'm beyond happy that we've come so far and are way beyond this now. It was a great day when we cleared this out and took down the shower-curtain-liner curtains. Pretty, huh?
Then we moved in the fireplace that Michael made for our other house, got the new table, rug, light fixture, etc. I'll blog more later this week about other details in the room. It's still not 'done' but, like in every room of our house, it's fun to look back at what it was and how much better it is now.

Dec 9, 2011

Merry Christmas to Me!

Santa's Elves woke me up at a crazy hour this morning (6am...and for me that is e.a.r.l.y) but I didn't mind because it was almost like my very own Christmas morning!

The Elves...were actually two men from Williams-Sonoma's delivery company and they were here to bring my dream dining table right into my dining room!

They call it 'white glove' service and they weren't even kidding about that...the guys actually wore white gloves!

And they left me with the most beautiful beat-up, scratched, dented, old looking table...I love it! The hubs and I have been stalking Pottery Barn looking at this table for 2 whole years and finally had enough cash-back saved up on our Discover card that we could buy the table for almost free.

The 'rustic' look was really important to us since 4 children are a bit hard on furniture (to say the least). But with this table they can stick forks in it and you won't be able to tell.

There were a couple little scratches that we noticed this morning and the delivery guy got a black permanent marker (no lie) from his truck and made the scratches completely disappear. That's my kind of table!

And it seats 12...so who wants to come over for dinner???

Oh wait...little problem...I still don't have a working stove or even microwave so we might have to wait a little while longer for that. But when I can cook again...who wants to come over?? :)

Related Posts Plugin for WordPress, Blogger...
 
Bloglovin Facebook Pinterest Instagram Email RSS RSS