Jan 27, 2014

DIY a Reversible Bib: Great Baby Gift


This post originally appeared on The Sewing Rabbit and today I'm bringing it home. 
Looking for the perfect, easy baby gift to make? Well look no further than this tutorial for a reversible bib that doubles as a burp cloth. (And for more gift ideas be sure to check out my patterns.)


Jan 15, 2014

FREE Owl Puppet Pattern...and a giveaway


We're halfway through this week of Downton Abbey/1920's inspired sewing. Be sure to check out day 1 and day 2 to see the amazing and inspiring posts. There's more fun coming up later this week, and we'll wrap the series up on Monday.


Today, though, I'm sharing a FREE pattern and tutorial on how to make an adorable owl hand puppet. Why a puppet? Well, puppets would have been something kids in the 1920s would have played with. Later this week we'll talk about paper dolls as well as handmade baby dolls and accessories, but puppets would fit right in there as a vintage toy.

Here was the inspiration for the owl puppets:


Whenever we visit my in-laws they get out some fun, old toys for the kids to play with. The last time we were there, my mother-in-law found some puppets and stuffed animals made by her mother. The adorable puppets are in great shape and I particularly loved these owls! (there were other animals too) How special that my kids can play with toys handmade by their great-grandmother! She obviously had great taste in fabric and an eye for patterns that go together. They're SO cute!

I took these owls home with me and made a pattern out of them...to share with you!

This is the perfect project for using up fabric scraps and the puppets are so quick to whip up. You can download the pattern here and then get the tutorial below. Be sure to scroll down to the bottom of this post for today's giveaway!

Materials Needed:
Fabric Scraps
Pattern Pieces (download the printable pdf pattern here)
Matching Thread
Sewing Machine

- First, print the pattern, tape the two pages together and cut out your pattern pieces. Each pattern piece is marked with how many pieces need to be cut out of your fabric. Here are all the pieces you will have:


- Sew the eye pieces together. Start by sewing the pupil to the smallest oval, then sew those pieces onto the medium oval, and finally onto the largest eye pieces. You'll simply be top-stitching close to the edge of the fabric. Repeat these steps on the other eye.

- Attach the head piece to the right side of the main body fabric by stitching close to the edge all the way around. Repeat on the other body piece. Your pieces should look like this:


- Now attach the wings to both the front and back body pieces.


- Sew the eyes and beak onto the front body piece. Then sew the tail onto the back body.


- Finally sew the front and back body pieces together (with right sides together) using a 1/4" seam allowance and leaving the bottom of the puppet open.

- Trim the seam allowance in the ears and clip curves. Turn right side out. Hem the bottom if you'd like, and then top-stitch around the entire puppet to finish it.


Enjoy your new puppets!

Now for today's giveaway. Wouldn't it be fun to have some beautiful new fabric for making your puppets? The Downton Abbey collection by Andover Fabrics is full of gorgeous prints and would be great for quilts, clothing, or even puppets! Here are a few of my favorites from the collection:


One winner in today's giveaway will win a yard of fabric from the Downton Abbey collection. (open to US residents only)

A second winner will win the complete collection of CharmingDoodle pdf sewing patterns, including the new Knight Hoodie and The Ultimate Apron. (open worldwide)

Enter using the widget below. Good luck! And be sure to come back tomorrow for another fun giveaway and more 1920's fashion inspiration! If you're sewing along, use the hashtag #downtonsewing and I'll be featuring some of your projects next week!

a Rafflecopter giveaway
“DowntonTM and Downton Abbey®© 2013 Carnival Film & Television Ltd. All Rights Reserved Under License To Andover Fabrics.”

Dec 5, 2013

DIY Sparkle Cuffs


This post originally appeared on The Sewing Rabbit and today I'm bring it home. Wouldn't some sparkly cuffs be fun for Christmas?


Tis the season for all things shiny and glittery. So why not bring some glitz into your kids' clothes? With this easy DIY you can use any shirt or cardigan pattern you already have and add a touch of sparkle and shine to it with sequined cuffs.


Materials Needed:
moderate stretch fabric
stretch sequin fabric (only a few scraps needed)
shirt or cardigan pattern

Steps:
First you'll need to make the shirt or cardigan according to the pattern directions. The only change you'll make is to the sleeve. Be sure to cut the proper size sleeve you need at the shoulder seam, but then flare out the rest of the pattern piece a bit to add a size or two by the time you reach the bottom of the sleeve.

I cut a size 6 shirt for my daughter, but the sleeve is actually a size 8 to make it nice and full so the cuffs really stand out later. I also made sure the sleeves were long to begin with by going all the way down to her wrist so the cuff will cinch up the sleeve a bit later.


Next you need to cut your cuff pieces using the dimensions below. (this cutting guide will work for children's sizes 5-8, if you are making a smaller or larger garment just adjust the height and width to what works for your child)


On your main fabric, fold up one long edge to the wrong side one inch. Sew close to the edge to make a hem. (having this hem at the bottom of the sleeve will keep the sequins from touching your child's skin and will be much more comfortable for them)

Now place one long edge of the sequin fabric right sides together with the main fabric along the hem you just sewed. Sew close to the edge of the sequin material. (you'll be sewing along the hem seam)


Fold the sequin fabric up and finger press it at the lower seam. Clip any sequins that are poking out.

Fold the cuff in half width-wise right sides together and sew with a 1/2" seam.


Try the cuff on your child and tighten if needed.

Sew a basting stitch at the end of the shirt sleeve. Gently pull the bobbin thread and gather the sleeve to fit the cuff.

With the sleeve inside out, place the cuff inside it matching the raw edges. (be sure to line up your seams) Sew the cuff to the sleeve with a 1/2" seam allowance.


Trim sequins in the seam allowance and finish your seams. That's it! Enjoy your sparkly new cuffs!

And if you have leftover sequin fabric it would be perfect for embellishing The Ultimate Apron using the pattern by CharmingDoodle. Use the coupon code SPARKLE to save 20% on this adorable pattern.

Happy sewing!


Dec 2, 2013

Fabric Deer Head for Decoration


Have you downloaded the FREE fabric deer head pattern yet? You can get all the details on it here.

I promised to show you how to make a smaller deer that could be used as decoration on your Christmas tree and today's the day!


Here are the two different versions of the deer that I made:


What you can't tell in these photos is that the deer are completely different sizes. The picture below will put that into perspective. Here is my 4 year old holding both fabric deer.


The Rudolph on the right is the original size and is the size your deer will be if you use the pattern as is. The smaller deer in floral fabric was made by printing the pattern much smaller.

The smaller size is perfect for hanging on a Christmas tree or even attaching to a large gift. I wouldn't recommend making it any smaller than I describe below because it would get really difficult to stuff the antlers correctly.

Here's how to make the smaller version:
After you download the pattern (follow the directions in this post to download it from my facebook page), open the PDF and click Print.

When the print dialog box opens up, select 'Multiple pages per sheet' under Page Scaling.

This is a screen shot of what it will look like. See how there are now two pages on the same paper? It scales the whole pattern down and will let you make a deer less than half the size of the original.


I would LOVE to see what you have made with the deer/Rudolph pattern. Please share your version with me on my facebook page or by emailing, messaging me, or tagging me on Instagram. I will feature some of your creations soon!


Nov 11, 2013

DIY a Dinosaur Hoodie with free pattern

This post originally appeared on The Sewing Rabbit and today I'm bringing it home. This sweatshirt is still Henry's favorite and it's a crisis when it's in the wash! :)

Autumn is here! Fall is by far my favorite season with the cooler weather, falling leaves, and comfy clothes. Bring on the hooded sweatshirts!

Hoodies are one of those things that are easy to make...but also pretty inexpensive to buy in the store. So if you're going to go through the process of sewing your own hoodies, why not make them unique and fun? There are tons of personal touches you can add to a hoodie pattern to make it special for your kids. And trust me, when you make a dinosaur hoodie, your little one won't want to take it off!
Believe it or not, I made a hoodie for each of my four kids using the same pattern. With a few tweaks here and there each one became a custom piece perfect for their unique personalities. Below are the instructions you need to DIY a dinosaur hoodie, and you can get the details on the rest of the sweatshirts I made here.

The dinosaur hoodie is one of my favorites and perfect for this time of year, fun...but not too costume-y. It's also really easy and quick to make. Want to make one too? Here's how:

First you'll need a hooded sweatshirt pattern. I used McCall's M6782 but there are lots of indie patterns you can use as well. Any hooded sweatshirt pattern should work as long as it has a two piece hood (so the spikes will go down the center of the hood).

Once you have your pattern, you'll need to download and print the spike pattern here. I've included four different sizes of spikes you can use and labeled the number of each I used for a size 3T hoodie. You can use more or fewer spikes and if you are making a bigger sized hoodie, just cut out a few more spikes.
The steps to sew on the spikes are simple:
Step 1: Place your two felt spike pieces wrong sides together and sew around two of the sides with a narrow seam allowance.

Step 2: Turn the spikes right side out and press them. Then place the spikes along one of your hood fabric pieces to get the spacing of the spikes the way you want.

Step 3: When you're happy with your spike placement, line up the raw edges of your spikes with the raw edge of the right side of a hood piece. Then you'll simply place the other hood piece right side down, sandwiching the spikes inside the hood. Sew along the hood pieces using the seam allowance noted in your pattern.

Then continue sewing the hoodie according to the pattern instructions. That's it!

And if your little one is anything like mine, you'll get a few big roars when they get to test out their new dinosaur hoodie.

Don't forget to check out the hooded coat, knight, and ruffly pink sweatshirts I also made from the same pattern. And if you make a dinosaur hoodie we'd love to see it!

Happy sewing!

Oct 28, 2013

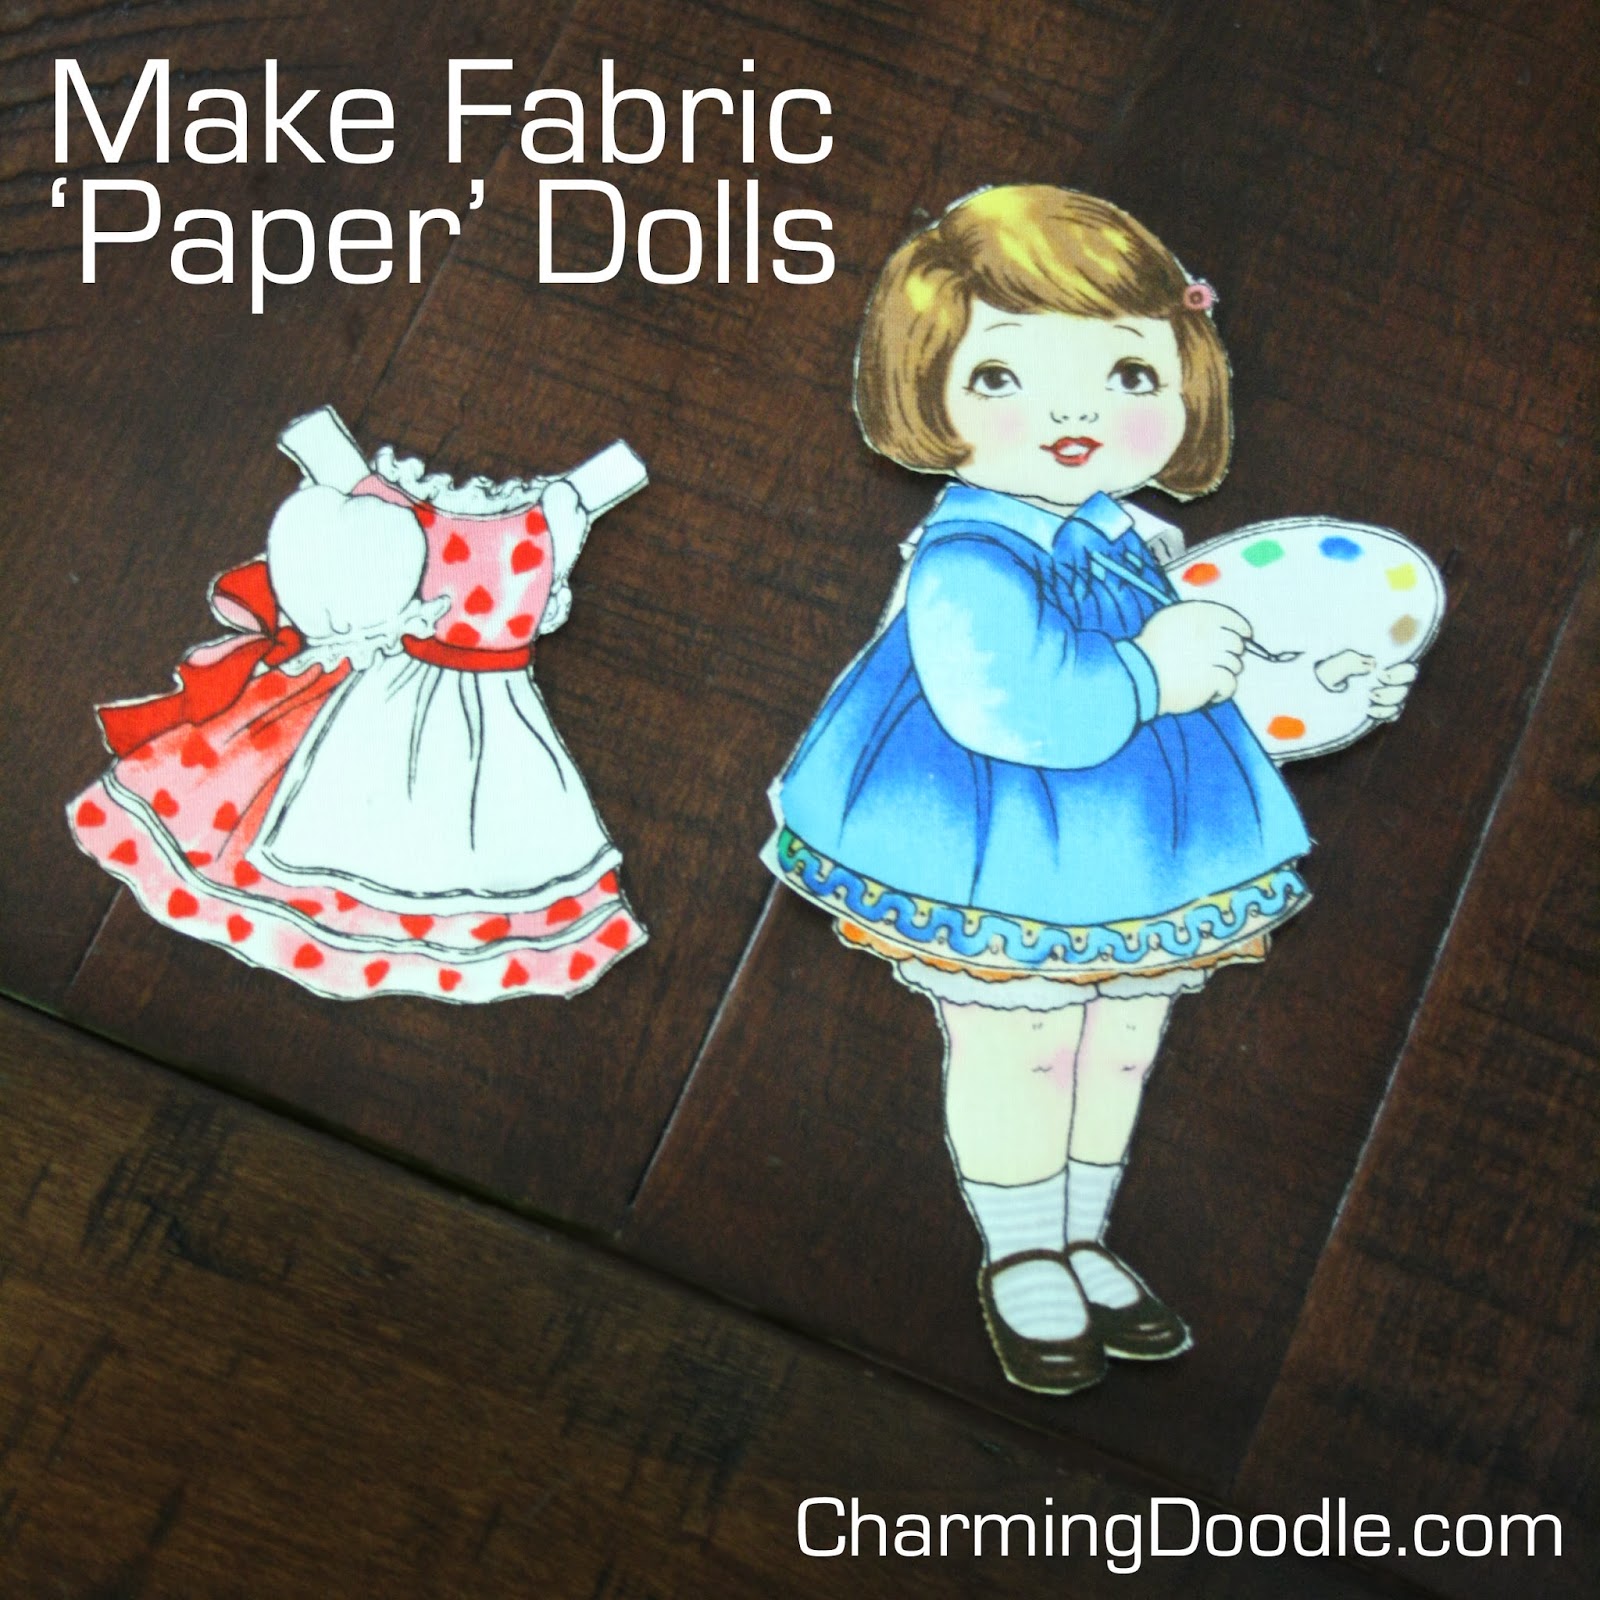
DIY Fabric 'Paper' Dolls

Do you remember playing with paper dolls when you were little? I do and they were SO much fun! My parents recently took a cruise to Alaska and brought back a fantastic set of paper dolls for my girls with all different Alaskan outfits. Cute!

Real paper dolls like those are harder to come by now....and let's be honest, kids tend to rip paper so after a while the dolls have fewer dresses to wear! :)


When I was fabric shopping in Minnesota I came across this amazing fabric with 'paper' dolls all over it. There were several versions of the fabric, one with dolls, and two others with different clothes. I bought a bit of each and have lots of these cute and easy-to-make fabric dolls to put together for my girls this Christmas.


Materials Needed:
Paper Doll fabric (These are Paper Dolls Schoolhouse by Newcastle Fabric)
Ultra-firm Stabilizer (I used Peltex)
Scissors
Iron

First roughly cut out the paper dolls and clothes. Then cut a piece of stabilizer similar in size.


Fuse the stabilizer to the fabric following the manufacturer's directions. Then cut closely around the doll and clothes shapes.

You're done!

I made two dolls and a set of clothes for each to see if my girls would like them and they were thrilled! They spent a long time playing with their new 'friends' and later that night I found Isa sleeping with her fabric paper doll!


You could do lots of variations of these using the paper doll fabric. Adding Velcro or snaps to the outfits would keep them on securely. You could use fusible fleece and the dolls would stick to a piece of flannel mounted in a frame. Or you could sew these with an additional piece of fabric on the back and stuff them as a soft doll.

If you make some dolls I'd love to see them! Happy sewing!

Sep 17, 2013

Sewing for Kindergarten - How to Make a Nap Mat


I have been looking forward to Mie's fabulous series on Sewing for Kindergarten! I am honored to be part of the series and had SO much fun sewing for my baby girl as she got ready for her first year of school. For more inspiration be sure to follow Mie's blog, Sewing Like Mad. Mie is also competing on Project Run & Play...you won't want to miss voting for her amazing look this week!

I created FOUR different things and posted tutorials for a couple of them last week. (Adding a Pocket to a Book Bag, and a Girly Paint Shirt with tutorial on how to make round pockets) Tomorrow I will post about the fun school uniform-approved pants I made, but today is all about my girl's favorite of the items I made for her.

My little kindergartner, Emerald, loves her new pants, book bag and paint shirt...but she really loves her nap mat!
Emma is a girl who loves anything pink, but her school has uniforms and sadly, pink is not one of the approved colors! But even though she can't wear frilly pink dresses and skirts, she can have a pink, super-girly nap mat to use for rest time each day.

And the best part about this nap mat is how easy it was to make! Want to make one too? Here's how to do it:

The only materials you will need are a beach towel (to act as a template for the size of your mat), your sewing machine, and two different fabrics. One side will also act as the 'binding' so you'll want the fabrics to coordinate somewhat. I used two really soft fluffy fabrics in solid pink and assorted color hearts.

Note: for this tutorial I am calling the fabric with hearts the 'contrast fabric.'

The first thing you need to do is cut your fabric to the size you want your nap mat to be. You can use a beach towel as a template to cut your fabric into the size you want. I used a beach towel to cut my contrast side, and then cut the solid colored side about 1.5 inches bigger all the way around. (this is for the binding)
Place your fabrics with wrong sides together on a large surface. The larger piece should be on the bottom and the contrast fabric centered over it.

Starting at one side, fold the long edge in 1/2 inch and then fold it up and over the edge of your contrast fabric so the raw edge of the contrast fabric is completely enclosed. Pin the binding down all the way around to hold it in place.
Then sew along the edge of the binding all the way around.

It couldn't be easier! You're done!
If you make a nap mat I'd love to see it! Hope your little one enjoys rest time even more knowing you made a personal little mat just for them!


Sep 16, 2013

How to Quilt Any Vest

Today you can find me over at The Sewing Rabbit sharing about a project I'm SO excited about! It's a reversible vest that I made for The Sewing Rabbit team's fall collection. There are many inspiring items in the collection, each with a free tutorial for you!

Elliott is completely in love with his vest and keeps trying to wear it places...over his short sleeve shirts in 90 degree weather! Ha! Hopefully fall will make an appearance soon and he can actually wear it and not look like a crazy man.

I have to be honest...this was one of the hardest projects I've made in a while. I had never quilted anything before and it was my first time making a flap pocket, using a reversible zipper, drafting my own collar in this style (I originally made a hood and didn't like it), working with the faux leather material, etc. LOTS of firsts for me in this project and I'm thrilled with how it turned out.
I'm sharing how to make a flap pocket at The Sewing Rabbit today, so here let's talk about how to quilt ANY vest. It's seriously easy to do (if you can sew a straight line - which I can do if I really concentrate) and it adds a special touch to your project.  You can literally use any pattern you have for a vest and it will work.

I quilted squares on my vest, but there are lots of fun designs you could quilt. Here are some examples for inspiration.
1 | 2 | 3 | 4

Below are instructions on how to quilt squares like I did.

Warning: There is some math involved...but I promise it looks much more complicated than it actually is. The bottom line is that you want your quilting lines to be straight and even so read through the instructions here carefully and it'll be a breeze!

Materials needed:
- Your Vest Pattern
- Fabric for the main side of the vest and the lining (I made mine reversible but you could just line it as well)
- Batting - I looked for a semi-thin, washable batting to use as my quilting layer. You could also use fleece or skip the batting altogether if you just want the stitched lines instead of the deeper quilted look that the batting will give you.
- Chalk or some kind of fabric marking pen to mark your quilting lines

First cut out your pattern pieces in the fabric, lining, and batting.
Begin marking your quilting lines on the front panels. To do this, you'll need to do some math. Here's the basic way to do it if you want squares that look like mine.

You need the following numbers:
- Measure the width of one front vest piece at the widest point. (mine is 8.5 inches from mid-chest to the lower arm opening)
- Decide how big you want your quilted squares. (I wanted mine to be about 1.75" each)
- Your seam allowance - you will have to account for it in your measurements. (I used a .5" seam allowance)

So here's the match calculation to do to get the width markings:

Width of pattern piece - seam allowance - seam allowance = total dimension of space you can work with
8.5 - .5 - .5 = 7.5 inches

Take that total and divide by the width you want each square to be.

7.5 / 1.75 = 4.29

This gives you how many squares you'll have at the widest point. Mine did not come out to a nice even number. I could have decided to make each square 1.5 inches and then I'd have 5 squares across at the widest point of the vest...but I decided it didn't matter since I was making a tapered vest so eventually as you go down toward the waist some squares would be cut short. So I have 4 squares plus a sliver to work with.

If you want your squares to be even, this is the time to figure out the dimensions. Do a little trial and error with your numbers until you come out with the length and width of each quilted square.

Now it's time to mark. I started at the bottom hem of the vest, working from the center line (where the zipper will be) toward the side. My first vertical chalk mark is made using the following formula:

Seam Allowance + width of square = first mark

1.75 +  .5 = 2.25 inches from the center line

From that mark I measured another 1.75 inches to the next mark, and so on until I got to the edge of the fabric. (no need to worry about the seam allowance on the side seam - the center mark is most important) I repeated the markings, measuring from the center line, all the way up the front of my fabric. Don't worry about how far apart your vertical lines are, just mark every few inches so you can later come back and make a line with a ruler.
Then you need to mark the horizontal quilting lines.

This is done in the very same way, but now you need to account for the hem at the bottom. Since the lining was going to be attached to the bottom of my vest piece with a regular seam allowance (of .5 inches) I just measured up from the bottom of my fabric 2.25 inches and made a mark, just like I did from the center line. Same measurement.

Then I made more lines 1.75 inches from the first set of markings to continue up the vest front piece again.

You've made a partial grid now, but it's best to go through and use a straight ruler to make definitive lines through your marks. You're making a complete grid with chalk that you can use to follow as you stitch.
Repeat the marking steps for the other front vest piece.

For the back, you will make marks the same...but pay attention to where the middle of the back is so your vest looks symmetrical. I started in the center and worked my way out toward the sides marking every 1.75 inches vertically and horizontally. (being sure to stay 2.25 inches from the bottom hem)

BEFORE YOU BEGIN QUILTING add any welt pockets or other embellishments.

Now you're ready to actually quilt the vest! Place the batting behind the main fabric. (I suggest using a basting stitch along the edge of the pieces to keep the batting in place as you stitch.)

Then simply stitch along your chalk lines. Easy!

If you have pockets on your vest, be sure to pull the pocket part inside out so you don't quilt through it. (If you did that, you wouldn't be able to put your hand through it!)
When you're finished quilting, you'll want to flip the vest to the batting side and you will be able to see where your pocket opening is. Carefully cut a small slit in the batting and pull the pocket pouch through the batting, making sure it is free enough to put your hand easily inside the pocket.
Here's what the batting side of the back of my vest looked like after I was done quilting it.
Now all you need to do is sew your pieces together according to the patterns directions. If your original pattern didn't call for a lining, stitch the lining pieces wrong sides together with the quilted panels and then sew the vest together using the pattern instructions.

You are done!!
If you make a quilted vest I'd LOVE to see it!
Happy quilting. :)


Related Posts Plugin for WordPress, Blogger...
 
Bloglovin Facebook Pinterest Instagram Email RSS RSS